Background
Amazon started as company with an online bookstore. Good old fashioned paper editions were offered for sale via the Amazon webportal. Behind the curtains, Amazon organized the logististics such that different publishers could supply the purchased books as fast as possible.
It turned out that booksales fluctuate much over the year in the US and in Europe. The month before Christmas is traditionally very busy. Amazon had to develop their webstore as to acommodate these large fluctuations of customer visits, over time. Over time, Amazon realised that they had developed a highly efficient web-architecture, which could be offered as a general cloud platform to third party customers. So Amazon went on to develop an easy-to-get-started-with cloud platform for commercial purposes. This platform is today known as Amazon Web Services, or AWS.
AWS – Getting Started
First, you need to determine whether AWS is the cloud solution you need. If for example you are a Microsoft enthousiast developing webservices primarily in .NET, the Microsoft cloud Azure will be the preferred option. AWS, on the other hand, is really cool for Java-developers with Linux experience. Although most configuration of AWS takes place via clickable web-forms, you need to master Linux/Unix commands at a certain level to be able to configure an AWS server correctly. I had to upgrade the native Java-installation from 1.7 to version 1.8, for example, in order to be able to run my Java-Spring Webservices.
It should be kept in mind that AWS can also run hosted Windows computers. On the other hand, Azure also allows you to deploy Java applications in a Unix instance, the latter option is described in the web-tutorial run Java under Azure.
Getting started – your first AWS-node
You need to register yourself with AWS, using a valid email-address.
Via the link: create account
(click on the upper-right button in orange color).
You register with AWS as customer/user.
AWS provided you with a set of options. I chose a Linux image, for my EC2-instance.
What’s on the AWS EC2 instance ?
When newly built, the AWS EC2 instance is a bare Linux computer. Depending on the requested configuration (# CPUs, etc.), more computing power is available at your disposal. So you login and get a unix-prompt. I continue with an Ubuntu installation.
You need to know the installation commands from Ubuntu:
sudo apt-get install <your application to install>
Where are applications located, initially, on your EC2 Linux machine?
Tomcat7 is located in:
/usr/share/tomcat7
/var/lib/pgsql9
So on my EC2-instance, both Tomcat and Postgres are unix-services. To start my local postgres, you do:
sudo service postgresql start
When working with more than one EC2-instance behind an AWS load-balancer, you will typically locate your relational database on a different EC2-node.
The different EC2-instances running your applications can connect to the data-service instance which hosts the relational database.
Run tomcat with https – AWS
When web-applications exchange sensitive information with a user (your user-id, your password, some personal information, financial data, etc.), you need to go into secure web-mode, which is called https. Https-mode is shown in your browser-address, beginning with: https://mywebsite.com.
In AWS, you have different options for evoking https.
- One option is to import an SSL-certificate and associate this directly with your IP-node.
- A second option is to run your Tomcat application with a .keystore file
- Finally, you can define a load-balancer and acquire an SSL-certificate (for free) from AWS for your acquired web-domain. This third option is detailed below on this web-page (Section ‘AWS basic node setup‘).
Run Tomcat with a .keystore file (self-signed certificate or a purchased SSL-certificate): Your tomcat-installation requires a security-certificate, which you need to purchase, separately.
First modify the file: conf / server.xml, in the Tomcat-installation:
...
<Connector port="8443" protocol="org.apache.coyote.http11.Http11Protocol"
maxThreads="150" SSLEnabled="true" scheme="https" secure="true"
clientAuth="false" sslProtocol="TLS" />
...
Per default, Tomcat expects the purchased certificate file, .keystore, to be located in the directory:
/usr/share/tomcat7
Stop and start the tomcat service, and you will be able to run https web applications.
AWS Security
AWS basic node setup
The picture below illustrates two basic design configurations within the AWS-cloud.

The left setup is the most simple one you can configure in AWS. It consists of one single virtual computer (one EC2-node), and the cloud engineer solely has to select the number of CPUs, the amount of memory, and the other standard AWS-configuration options such as the security groups.
The right setup consists of a load-balancer, two EC2-nodes, and a separate database instance (a separate virtual machine). The two EC2-instances A and B share the relational database.
AWS Load balancing
Three different elastic load balancing approaches are available within AWS:
- Application Load Balancer. Optimizes for http-requests.
- Network Load Balancer. Specifically for TCP-requests.
- Classic Load Balancer. General load balancing between EC2-AWS instances.
Before disucssing these different approaches, the purpose of load balancing is explained.
Load Balancing automatically distributes incoming application traffic across multiple virtual computers, that is, Amazon EC2 instances. The more requests occur on a website, the higher the traffic load and hence CPU-load as well as used memory. Load balancing was invented to make possible adding computer resources to handle an increasing number of requests.
In the main-menu, you choose Load Balancers, Create Load Balancer, which yields the following begin screen in a wizard:

Just choose the http/https Application Load Balancer, and continue the self-explanatory wizard.
For more details, see:
https://aws.amazon.com/elasticloadbalancing/features/#Details_for_Elastic_Load_Balancing_Products
Another advantage of Load Balanced Services is that application upgrades can be performed while the application server is still available to http-visitors, that is, everyone can still approach one of the web-instances. A minimal configuration is one with a load balancer and two instances. One instance is shut down for upgrade, while the other instance keeps running. After the upgrade, the instance is again put into service, and becomes available to the http-users. Next, the second instance is being shut down for maintenance. The only disadvance for the website visitors is that temporarily slower web-sessions appear, during such upgrade operations.
Tutorial – setup classic load-balancer in AWS
In the following, a step-by-step instruction is being given to configure an SSL-certified (HTTPS) application load balancer in AWS, and connect it with two EC2-nodes. The most easy path is described where a new web-domain name is being applied for via AWS (Route53)
- Goto: https://console.aws.amazon.com/route53/home. Choose the left-hand menu item ‘Registered domains’.
- Click the button ‘Register domain’.
- Enter your wished-for web-domain, and commence the purchase of it (we only cover the case where a completely new, yet unclaimed domain name is being purchased).
- The actual assignment of the purchased domain takes a short while (in the order of minutes).
- As you will want to connect to your web-domain via HTTPS (SSL), your most convinient option is set of a load-balancer, and associate an SSL-certificate (provided by AWS) with this LoadBalancer. This ensures the small ‘PadLock’ in your URL-field of your web-browser, indicating that HTTPS is working, and secures the traphic from and to the web-application running via your domain.
- In the AWS management console, goto the section ‘Security, Identity, & Compliance‘ and the sub-heading ‘Certificate Manager‘.
- In the Certificates screen, click the button ‘Request a certificate‘.
- Choose ‘Request a public certificate‘ and in the subsequent screen ‘Add domain names’, enter your newly purchased domain name (steps 2 – 3 above). That is, enter in the field ‘*.mynewlypurchaseddomain.com’.
- Continue with the validation step, and choose ‘DNS validation‘.
- GoTo the ‘EC2 Dashboard‘, and on the left-hand side click ‘Load Balancers‘.
- Push the button ‘Create Load Balancer’.
- Select ‘Application Load Balancer‘ and click ‘Create‘.
- The screen that follows, starts with ‘Step 1: Configure Load Balancer‘.
- Choose a unique name for your Load Balancer.
Auto-scaling – allocate and de-allocate EC2-nodes
In AWS, it is possible to automatically add and remove EC2-nodes (virtual computers), based on the present computational load over the presently active EC2-nodes. This means that up-scaling and down-scaling of EC2-nodes is performed by AWS itself – on-the-fly.
Below (left), the red-enclosed menu items are the entrances to use for first creating an auto scaling launch configuration, followed by the definition of the relevant auto scaling groups. These groups are the ones in which the scaling EC2 instances will run.
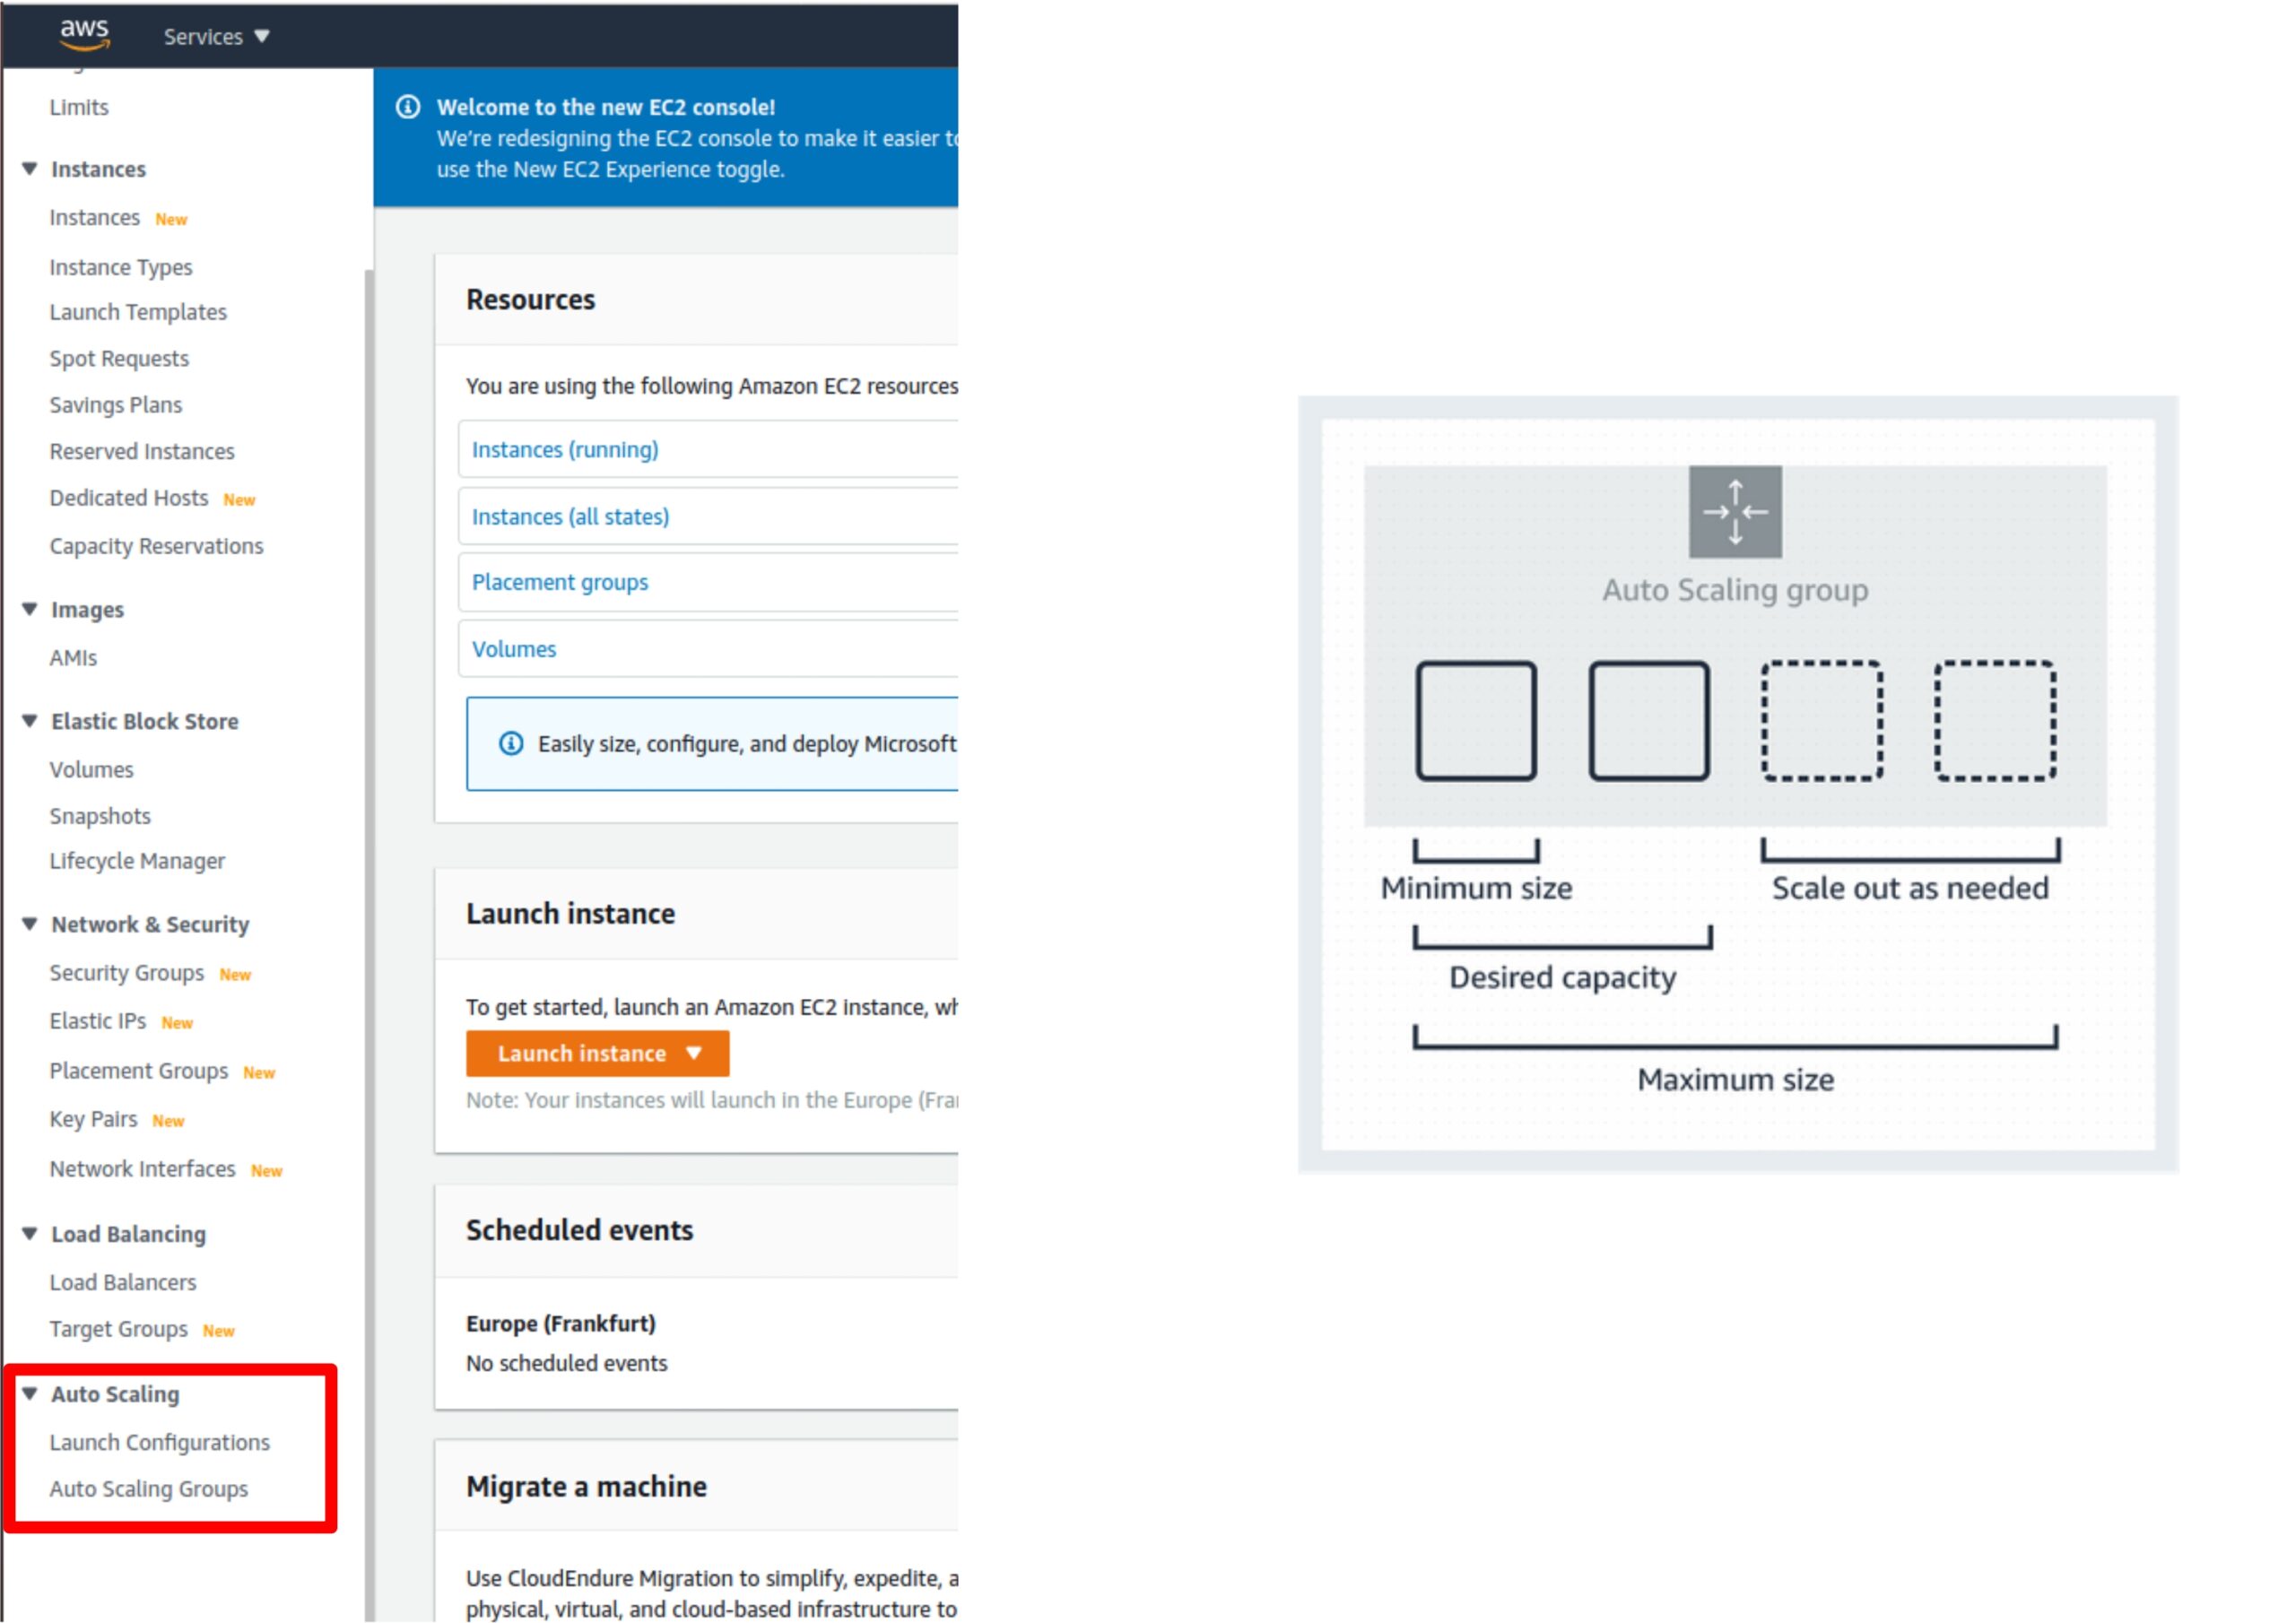
Above (right), is an illustration of the principle of auto scaling EC-2 instances (virtual computers) behind a load balancer.
It is easy to set-up auto-scaling in AWS. You first need to decide whether to use a Snapshot or an AMI-configuration to ‘fill’ additionally generated EC-2 nodes, when scaling up.
Most important is that your load-balancer handles the additional nodes – that it distributes load over these nodes when they are up-and-running.
AWS-CLI – command line interface
TIll now, all modifications of the AWS-configuration has happend via the AWS web-portal.
There is an extensive AWS command line interface, which can be used to control multiple AWS services from the command line and automate them through scripts.
See the contents of AWS CLI start.
Download CLI-Python AWS library from: AWS Cli in Git
Lambdas
It is also possible to configure so-called lambdas – pieces of executable code – in AWS. This is an alternative to building an EC2-server. Below is shown the Lambda ‘window’ of AWS – with a few lines of JavaScript code (the file is called index.js).
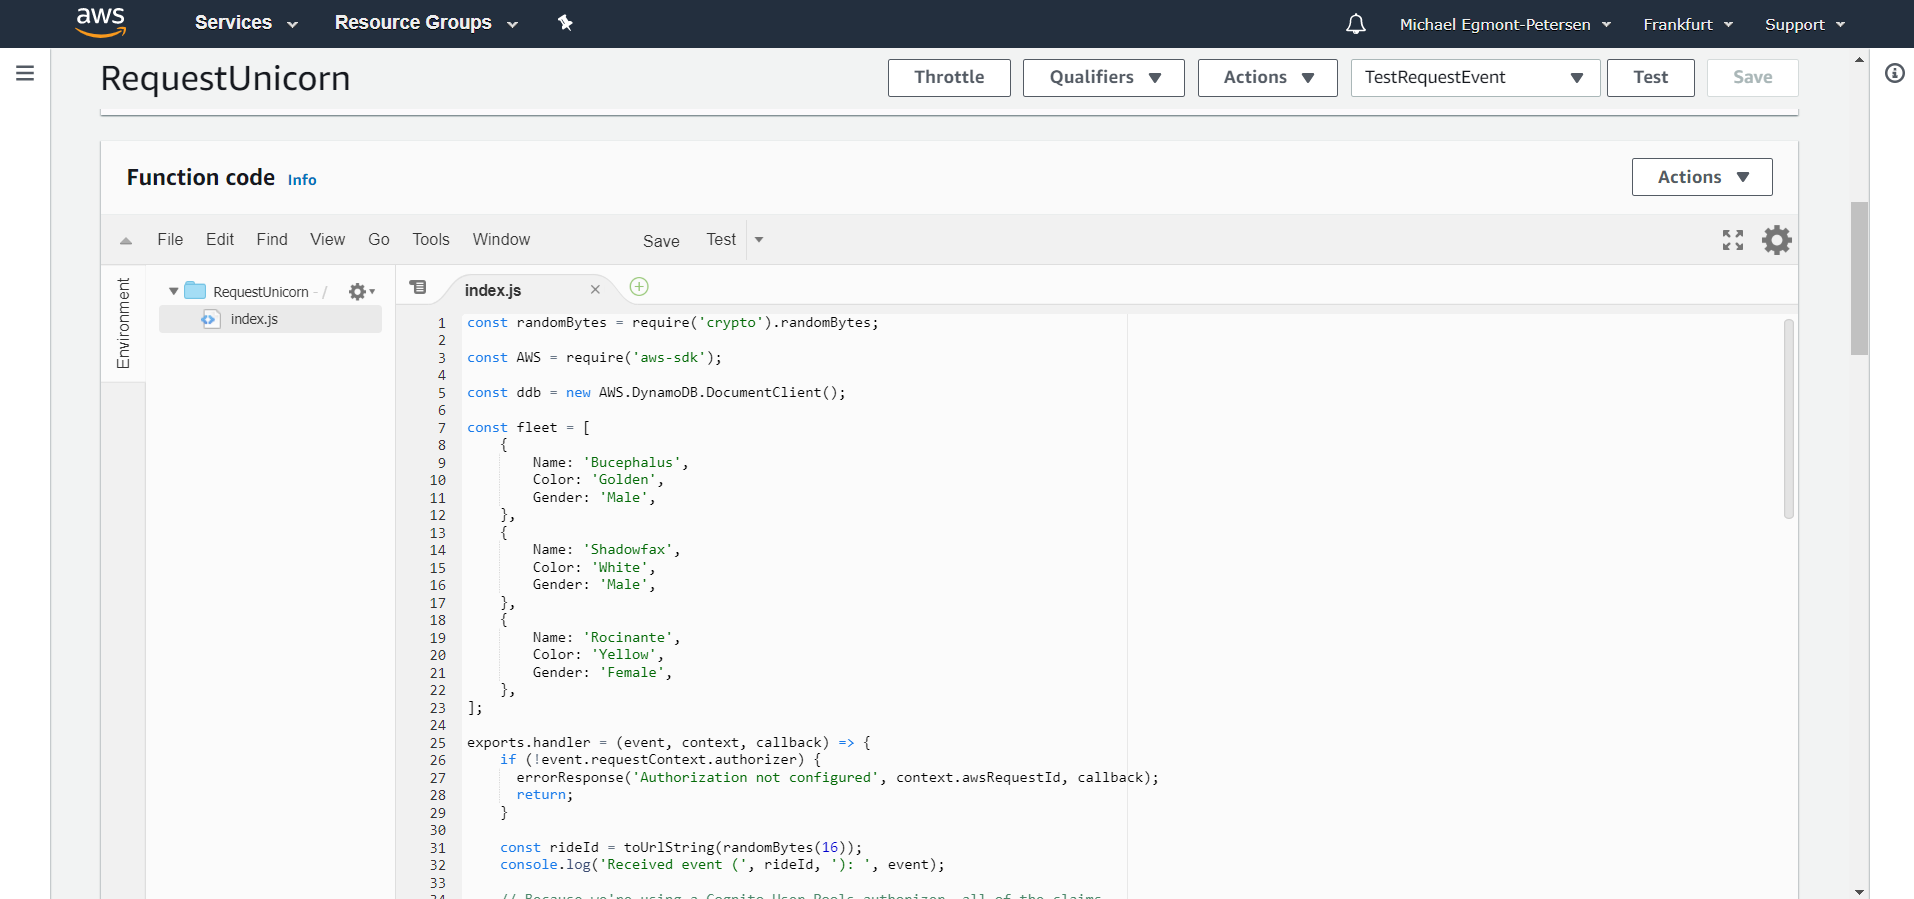
The code-entry point is
exports.handler = (event, context, callback) => ...
as you can see in the lower third of the screen, shown above.
When building an AWS-application around lambda’s, you run ‘serverless’. Compared with an EC2-server as explained previously in this tutorial, AWS runs the lambda’s when triggered from an http-point. Also other AWS native services can trigger the execution of a lambda.
This functionality is comparable to ‘functions’ in Azure.
Postgres – 11 on AWS
The standard installation on Postgres Ubuntu 2018 images is version 9.2. This Postgres version is outdated, is not longer fully compatible with JPA in EcliseLink, and asynchronous replication (the latter first being available from Postgress version 10 and on-wards).
I downloaded the Postgres version 11 from Postgres-repository. The file postgresql-11.5.tar.gz contains the sources of the Postgress version 11.
wget https://ftp.postgresql.org/pub/source/v11.5/postgresql-11.5.tar.gz
Move this gzipped tar file into a new sub-directory, and unpack it there:
tar -zxvf postgresql-11.5.tar.gz
You now need to compile (make) the Postgres database. A recent version of the GCC compiler is required in order to be able to compile Postgres.
sudo yum install gcc
Compile and install Postgress 11:
cd postgresql-11.5
./configure
./configure --without-zlib
make
sudo make install
and the installation is complete.
Instructions for initializing a (new) database, can be obtained from here.
AWS Lambda – serverless web-applications
A newer feature of AWS is the provision of Lambda’s, serverless computing services that run an application or just a script of your choice. So the server administration is organized for you, within the Lambda framework. Another major difference with EC2-instances is that the customer pays per execution time unit, rather than per node. So if you have much downtime, or your services is not used a lot, it can be cost-effective to run Lambda-services.
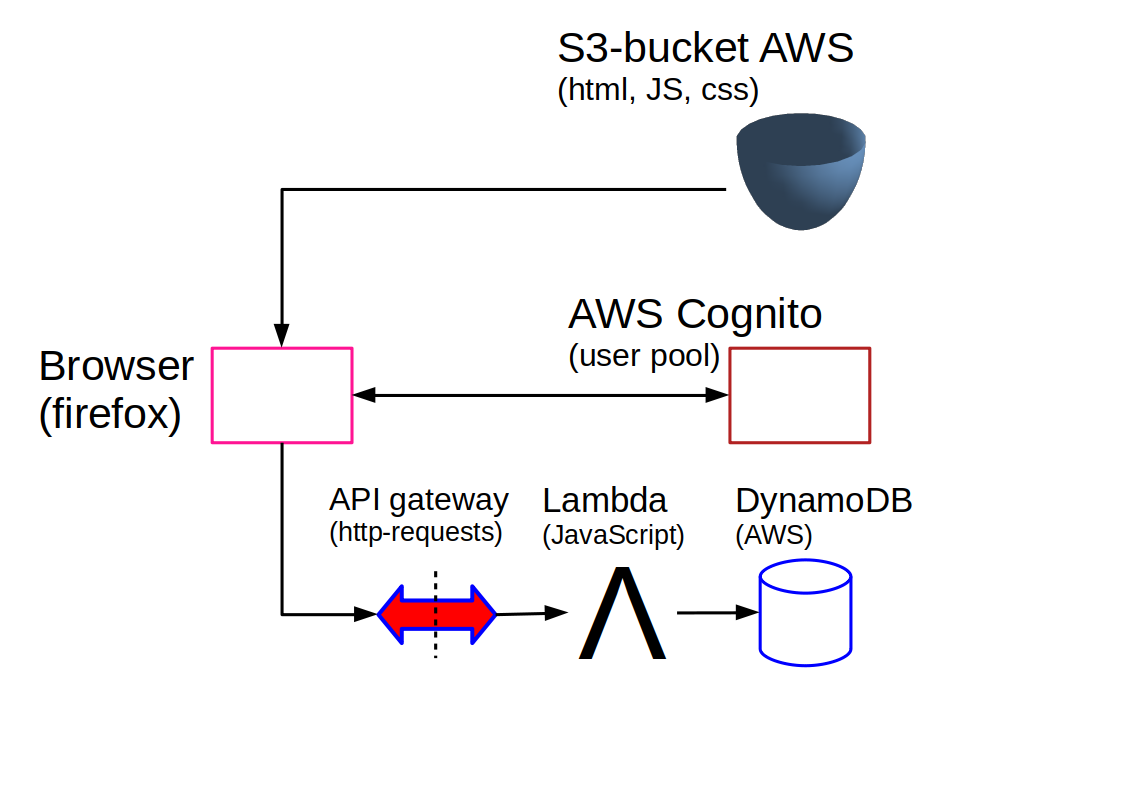
A serverless application is easy to get up-and-running under AWS. The following serverless web-service runs under AWS by means of a Lambda implementation: serverless web-application
The backend of this web-application consists of a DynamoDB database, as provided by AWS. The figure below illustrates the setup of the serverless webservice:
- The S3-bucket, essentially your harddisk.
- The Cognito authentication facility, which lets users register and subsequently login with the verified credentials.
- The application architecture, consisting of:
- The API gateway
- The Lambda function (in our case, a JavaScript file)
- The DynamoDB database
The Lambda-console in AWS looks as follows
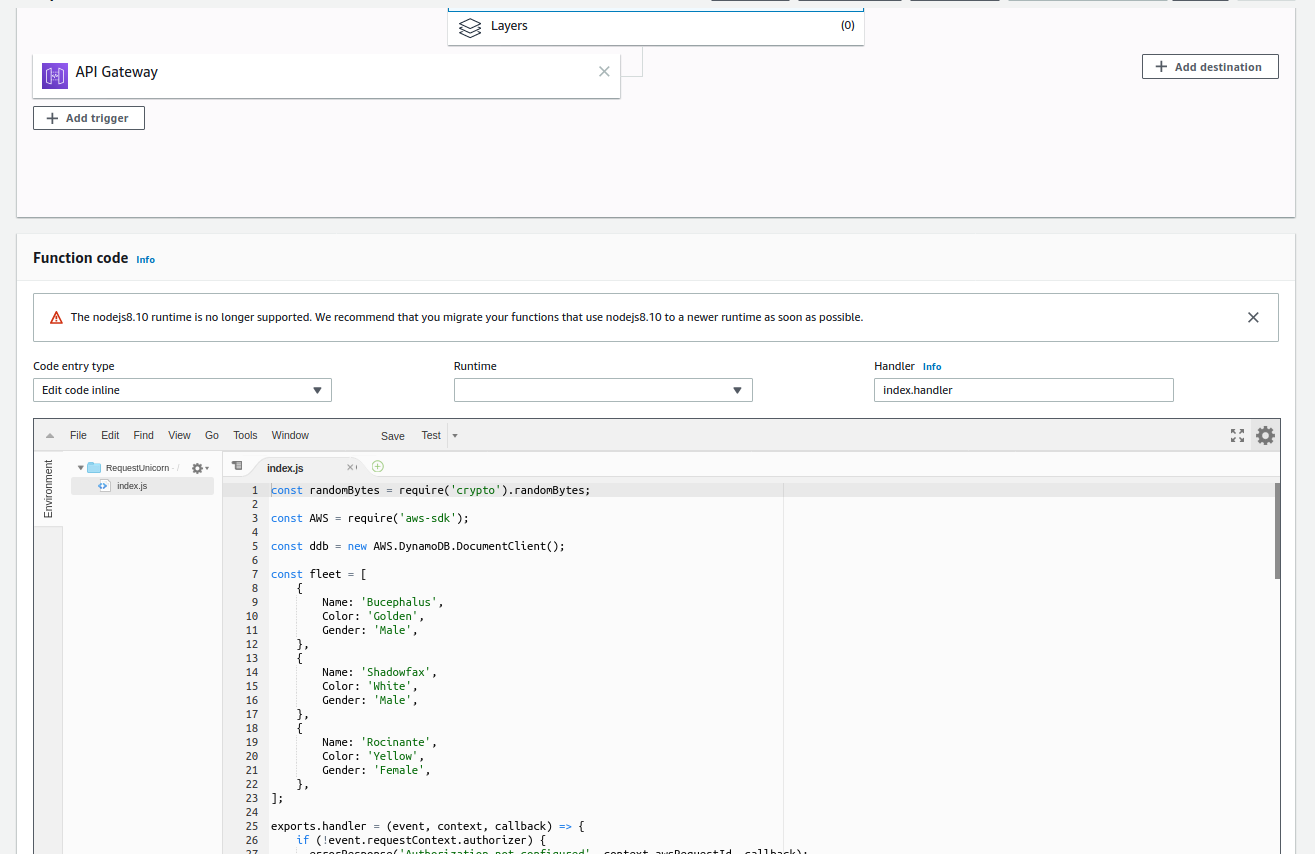
which contains the editor window for your JavaScript code.
Also Java is supported by the serverless lambda scheme.
AWS Machine learning
AWS contains a whole suite for performing machine learning – Amazon EMR. It enables you to assemble your data, perform data preprocessing, and learn machine learning models. Amazon Machine learning also contains Deep Learning. This more recent neural network technology has applications within image processing where a spatially hierarchical structuring of the successive layers merge, and reduce the raw image data into recognitions.
See: AWS courses (search for topic Machine Learning)